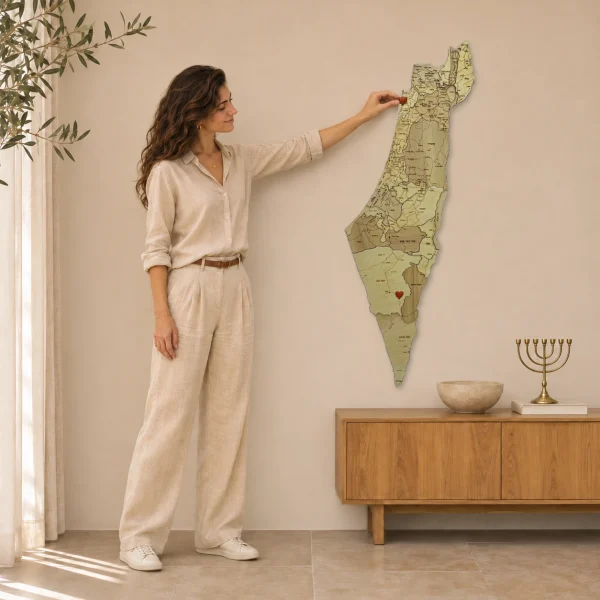
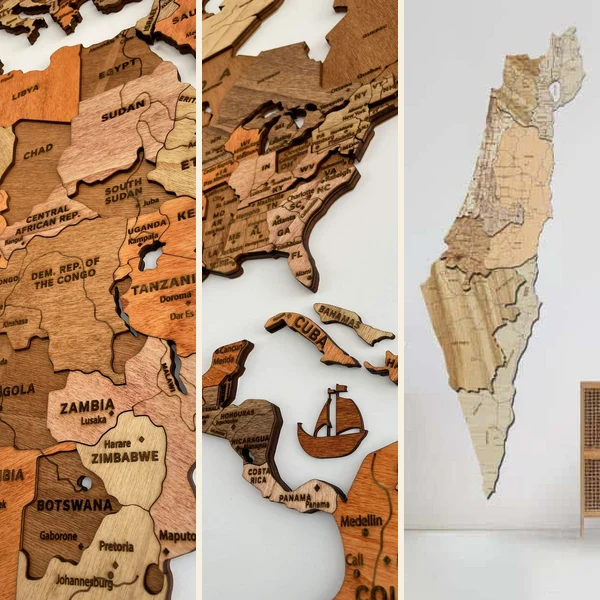
To choose a wooden map size, measure the available space on your wall and compare it with the dimensions of your chosen model. A room image can help you picture the style, but it is no substitute for measuring.
This guide will help you measure the space, compare your options and check the layout before ordering.
1. Measure the available space, not the entire wall
First, choose where you want to hang the map. Measure the width and height of the available area, taking account of its surroundings:
- Furniture, shelves and existing pictures.
- Sockets, switches and air vents.
- Doors, windows and curtains that open or move.
- The space you want to leave between the map and nearby objects.
If the map will hang above a sofa or desk, look at the space from where you normally sit as well. A map may fit the available area but still feel too large or too small in relation to the furniture.
You do not need to leave the same margin on every wall. Decide what suits your room and note the space that remains for the map.
2. Compare dimensions in centimetres, not just size labels
A label such as M or XL applies to a particular model. It is not a standard measurement across all maps.
The single-colour Israel map lists these options:
- M: 60×23 cm.
- L: 80×30 cm.
- XL: 120×45 cm.
The single-colour world map lists these options:
- S: 110×70 cm.
- M: 150×90 cm.
- XL: 215×115 cm.
- XXL: 260×145 cm.
- XXXL: 310×175 cm.
The Premium world map also lists these five sizes. Identical dimensions do not mean that the design or kit contents are identical, so check the specific model.
Before marking the dimensions on your wall, confirm which number represents the width and which represents the height. If the product page does not make the order clear, ask before ordering.
3. What is included within the map’s dimensions?
The listed dimensions cover the map’s planned layout and the accompanying elements included in that model, such as a compass. In the planned layout, these stay within the stated dimensions and do not require extra space beyond them.
You should still leave whatever space around the map suits your room. This margin is your choice and is not part of the product’s dimensions.
Distinguish between the model’s elements and decorative objects in a room image. An item appearing in a picture does not mean it is included in the kit. For example, the hearts in the single-colour Israel map mockup are illustrative and do not indicate kit contents. Check the product page for what is included with your chosen model.
4. Try out the size before choosing
Once you have confirmed the layout’s width and height, make a paper rectangle of the appropriate size, or gently mark its edges with paper tape suitable for the surface. Before applying tape to a painted wall, test it in an inconspicuous area; do not assume every tape is suitable for every paint finish.
The rectangle represents the space the map occupies, not its exact shape. Look at it from several places in the room, and compare two sizes if you are undecided.
Check:
- Is there still the space you wanted around the map?
- Do the edges conflict with furniture, a socket or a door opening?
- Does the size look right from where you sit or work?
- Would moving it slightly help it fit better with the furniture?
As an example only: if you have 180 cm of width available and choose to leave 15 cm on each side, that leaves 150 cm of width for the map. This is a calculation of available space, not a recommended fixed margin or confirmation that a particular model will fit. You also need to check the height.
5. Check whether a different size also means a different structure
Choosing another size sometimes changes more than the dimensions.
For the single-colour Israel map, M is one flat piece with engraving, in a 2D design. L and XL have several layers, in a 3D design. A photograph of the three-dimensional model does not show the flat structure of M.
If the depth of the layers matters to you, check the structure as well as the dimensions. Do not rely solely on the main image.
Checklist before ordering
You can note the following on your phone:
- Model name:
- Available wall width:
- Available wall height:
- Space you want to leave around the map:
- Size selected on the product page:
- Confirmed layout width and height:
- Kit contents according to the product page:
- Do the images show the size and structure you selected?
If anything is unclear, ask before ordering. To check the model that suits you, visit the single-colour Israel map, single-colour world map or Premium world map.